

Architectonics I
Turrets now deal 17-26% more damage, and have a 3s faster Cooldown.
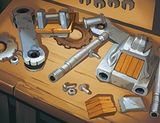
Turret

Combat Repair
Standing near your Turret heals it for {scale=50|50} Health every second.
Turret
1
Healing Station
Standing near your Turret heals you for 22.5-225 Health per second.
Turret
1
One Man's Scrap
When your Turret is destroyed heal for {scale=50|50} over 5s.
Armor
1

Bowling Ball
Gain a Shield with 150-1500 Health during Rocket Boots and for 4s after.
Rocket Boots
1
Forged Alloy
Increase the Health of your Turret by 87.5-875.
Turret
1
Guide
Hi guys!
SPAM TURRETA: It is a deck focused on survival based, since it has a high cure by our turrets and a fast CD of them.
Healing station: Makes our turrets heal us every second.
- Combat repair: Heal our turrets when we are close, this and the previous card are the perfect combination to survive.
- Bowling ball: Will provide a shield when we use Rockets Boots and so survive from an ambush or our death.
- One Man's scrap: When they destroy our turret, it will cure us.
- Forged alloy: Increase the life of our turret.
- ⚜ -
What objects to buy?On the defensive:
- Lighting: If we have enemies with a very high CM like: Bomb King, Drogoz, Grover, Inara, Jenos, Makoa, Mal'Damba, Pip, Strix and Terminus.
- Heaven: If there is not so much CM enemy.
In the utilities:
- Morale Boost: We can use this skill that has so much damage faster.
- Master Riding: It is usually the most used, because we got to defend the point much faster.
In healing:
- Rejuvenate: This will help the healer increase his healing to us.
In the offensive:
- Bulldozer: Will only serve against Inara, Ash and Barik.
- Cauterize: In this case, let's use it to reduce to more than 100% the enemy's cure, this depends if the enemy team has healer or not.
- Wrecker: Let's use it if the enemy has Fernando, Torvald or Makoa (it also breaks Vivian's shield).
- ⚜ -
Extra data:
- Counter objects: Wrecker, Haven and Bulldozer.
- Champions counter: Torvald, Tyra and Kinessa.
- Tips for counters:
- Torvald: When you face Torvald use your turrets as a decoy and get out of range of your silencer beam, try to take it to where your teammates are and continue generating turrets to heal and interrupt your attack.
- Tyra: Avoid fire bombs, as they can cause great damage to your Barricade (the bomb goes through it) and your Turrets (can not move).