

Architectonics
Turrets now deal 20% more damage, and have a 3s faster Cooldown.
Turret



Brave and Bold
Gain 150-750 Health.
Armor
3

Field Deploy
Reduce the Deploy Time of your Turret by 0.6-3s.
Turret
2


Forged Alloy
Increase the Health of your Turret by 175-875.
Turret
5


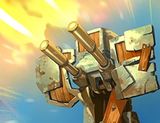
One Man's Treasure
Eliminations reduce active cooldowns by 10-50%
Armor
3


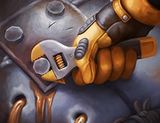
Combat Repair
Standing near your Turret heals it for 100-500 Health every second.
Turret
2
Guide
I am a Barik main, currently only in Gold IV (It's been ELO h-e-l-l for me). I have played over 600 games with him (which now seems like not all that much) and I've won 56% of them. I'm not one for boasting, I'm just doing this to establish the little credibility I have here. I will be coming out with a full guide next patch,, but I'll just talk briefly on building an Architectonics deck.
What I have here is what I personally run on it, but this isn't the only way I think it could be ran viably. Here are the card options:
Brave and Bold: This card is absolutely necessary for this deck. The durability is essential to make Barik tanky enough to sustain, which is especially important for Architectonics deck. I say run this rank 3 or 4.
Field Deploy: This one is replaceable, but I wouldn't recommend doing so. It helps you put out your turrets faster so that way you have less downtime. I wouldn't recommend taking it higher than rank 3 (other cards are more necessary), but it should be at least rank 2.
Forged Alloy: This is literally the main card in the build, without this Architectonics is almost literally unusable. It makes your turrets much tankier which is extremely important seeing as they'll be taking a lot of hits. I say at least rank 4 on this one.
One Man's Treasure: I personally believe this to be an essential card in any Barik deck. It is really hard to turn down the free cooldown reduction with Barik's propensity for assists and his fairly lengthy cooldowns.
Combat Repair: This card is optional, though I usually take it. It's a card that can further boost your turret's sustain. If you do take it, take rank 1 or 2. Past that is unnecessary and a bit limiting on the ranks you can run other more important cards.
Accelerator Field: A card I've overlooked until recently, though also optional. It allows you to weave in and out of Barricade more effectively with it's movement speed boost. If you take it, take rank 2. Past that is unnecessary, and rank 1 doesn't really provide much benefit.
Failsafe: A potential option, though I don't take it in an Architectonics build. It refreshes the cooldown of Rocket Boots when your health is low enough. I would take it rank 2 if you do decide to take it in this build.
Bowling Ball: Take this only in synergy with Failsafe, if you really think you need it. It grants a pretty nice shield when you use Rocket Boots. For this build I would only take it rank 2. Though for Tinkerin, I would recommend higher due to that build really utilizing it.
As for Items I recommend the following (won't go into it, I don't want to type out an essay):
First: Always Master Riding (Only take 1, then move on)
Second: Rejuvenate, though Cauterize and Blues are potential options
Third: Cauterize, though take Rejuvenate if you haven't already. Blues are also an option.
Fourth: Cauterize or A Blue. You should have Rejuvenate already.
(Blues are Haven, Blast Shields and Resilience. Don't take Illuminate, if your team needs it that's not your responsibility to take).
Back
