

Architectonics
Turrets now deal 20% more damage, and have a 3s faster Cooldown.
Turret

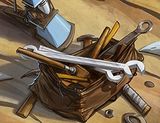
Field Deploy
Reduce the Deploy Time of your Turret by 0.6-3s.
Turret
2


Healing Station
Standing near your Turret heals you for 45-225 Health per second.
Turret
5



Bowling Ball
Gain a Shield with 300-1500 Health during Rocket Boots and for 4s after.
Rocket Boots
1



One Man's Treasure
Eliminations reduce active cooldowns by 10-50%
Armor
2


One Man's Scrap
When your Turret is destroyed heal for 100-500 over 5s.
Armor
5
Guide
- When battle not begin , put 2 turrets in base , then after match begin , put turet next turret to get heal from destroyed turet and healing station
Back
