
Poor's man roadhog
by Anonymous

Pluck
For 4s after hitting an enemy with Dredge Anchor, your next weapon shot against that enemy deals 75% increased damage.
Dredge Anchor


Strongarm
Reduce the Cooldown of Dredge Anchor by 0.6-3s.
Dredge Anchor
5

Tidal Grace
Heal for 55-275 every 1s while Shell Shield is active.
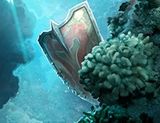
Shell Shield
5
Ebb and Flow
Reduce the Cooldown of Shell Spin by 20-100% after falling to or below 40% Health.
Armor
3
Barrier Reef
Reduce the Cooldown of Shell Shield by 0.2-1s for every 800 damage Absorbed.
Shell Shield
1
Determination
Increase your Healing received from other players by 6-30% while at or below 50% Health.
Armor
1
Guide
Buy chronos first
If things get nasty get away and use shell shield to heal... barrier reef and determination are filler cards but barrier reef can get you a nice cooldown on the shield
Back