
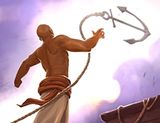
Rampage Mokoa
by MarviniXMC

Pluck
Gain 65% bonus damage on your first shot after hitting an enemy with Dredge Anchor.
Dredge Anchor


Strongarm
Reduce the Cooldown of Dredge Anchor by 0.5-2.5s.
Dredge Anchor
3

Sea Legs
Gain 6-30% lifesteal after hitting an enemy with Dredge Anchor.
Dredge Anchor
5
Harden
Gain 5-25% Damage Reduction for 2s after hitting an enemy with Dredge Anchor.
Dredge Anchor
2

Spring Tide
Shell Spin heals you for 250-1250 for every enemy hit.
Shell Spin
2
Rampage
Gain 8-40% Movement Speed for 6s after getting an elimination.
Armor
3
Guide
Cards:
Strongarm: You will use your Anchor very often. Use the Anchor when its Cooldown reached 0 and when an Enemy is in Range.
Sea Legs: You deal up to 1033 Damage with your First Shot after you using Dredge Anchor. Its important to HIT the people you hook with your Anchor otherwise youre Fuked
Harden: 10% Damage Reduction is always Good. You will use your Anchor Very often so...
Spring Tine: If youre under 2000 HP and there are 3 Enemys in front of you, use your Shell Soin and BAM youre on 3500 HP again.
Rampage: This is the Main Card of the Deck. After killing at least 1 enemy you can start your Rampage, Run at the Enemys and try to take out the Damage Champions then the Flankers, then the Supporters and the Frontline at last. IMPORTANT!: Hold your Anchor on Cooldown, you can kill a Furia in 2 Hits when you use your Anchor. (for example)
Items:
Kill to Heal [|||]: Buy this first! If you dont buy this you will not get healed on your Rampage, which is eh...
Caut: [???]: Depends on your Team, if you have less then 3 People with caut buy it and level it to Lvl 3 otherwise Lvl 2
???: Just any card (depends on the Enemys)
(Reminder: My English is not realy good)
I got 4 Nuclears in 4 Different Matches in a ROW so... it works! Try it out <3
Back