
Ranked OP Barik
by scorpion1129

Architectonics
Turrets now deal 20% more damage, and have a 3s faster Cooldown.
Turret


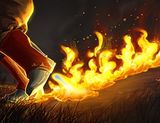
Bowling Ball
Gain a Shield with 300-1500 Health during Rocket Boots and for 3s after.
Rocket Boots
4


Brave and Bold
Gain 150-750 Health.
Armor
4

Healing Station
Standing near your Turret heals you for 45-225 Health per second.
Turret
3
Failsafe
Dropping below 10-50% of your max Health resets the cooldown of Rocket Boots.
Armor
3

Double Time
Increase the speed of Rocket Boots by 10-50%
Rocket Boots
1
Guide
Bowling Ball 4 - Barik can get away from the action safely
Brave and Bold 4 - Extra health very beneficial
Healing station 3 - Synergises with Architectonics and helps to heal Barik in and out of action. Keep turrets in a safe place to ensure healing is always available
Failsafe 3 - Rocket boots cooldown reset below 30% health allows Barik to safely get away from the action everytime. Synergises with Bowling Ball (stay alive!)
Double Time 1 - Increases te distance Barik can travel to safely get away from the Barik
Items - Max on Cauterise to help damages kill the tanks then buy Regeneration/Damage reduction to help stay alive
Back