


Fortress Breaker I
Siege Shield moves 80% slower, has 2550-3900 more Health, and is 50% larger.
Siege Shield
Battlement
Increase the duration of Siege Shield by 0.25-2.5s.
Siege Shield
1
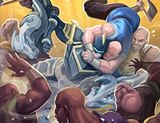
Brawl
Heal for 40-400 Health over 2s for each enemy hit by Kinetic burst.
Kinetic Burst
1

Percussion
Increase the knockback distance of Kinetic Burst by 4-40%.
Kinetic Burst
1
Fervor
You cannot be slowed below 50-95% of your base movement speed.
Armor
1
Indomitable
Gain 5-50% crowd control reduction.
Armor
1
Guide
Fortress breaker - block more incoming for you and your team
Battlement - the shield doesn't break with the LC at 6 sec duration so a extra second uptime doesn't hurt
Brawl - a additional means of healing
Vanguard - your a tank not a squishy so no reason you should be treated as such
Indomitable - crowd control sucks so heres you a little something to make them not as bad
Fervor - show your enemy itll take more than a slow to put you down
Back