
THAT WAS FUNNY
by Jinxx13_

Formidable
You now have 2 charges of Charge, each Charge deals an additional 100 damage, and you are Immune to Crowd Control while Charging, but the Cooldown of Charge is increased to 13s.
Charge


Running Start
Increase your Movement Speed by 10-50% for 3s after using Charge.
Charge
5
Heat Transfer
Reduce the Cooldown of Charge by 0.5-2.5s for every 1000 damage your Shield takes.
Shield
4

Fearless Leader
Reduce your active Cooldowns by 10-50% after getting an Elimination.
Armor
4

Looks That Kill
Reduce the Cooldown of Charge by 0.6-3s after hitting an enemy with Fireball.
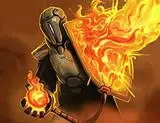
Fireball
1

Last Stand
Heal for 90-450 every 1s while Shield is active and you are at or below 35% Health.
Shield
1
Guide
Just have fun and you'll thank me
Back